Table of Contents
- Why Grip Changes Everything in the Kitchen
- Chef Knife Anatomy and Pressure Points
- The Pinch Grip: The Standard Technical Grip
- The Hammer Grip: When and How to Use It
- Positioning Your Non-Dominant Hand: The Guiding Hand and Bent Fingers
- Adapting Your Grip to Your Hand Size and Knife
- Chef Knife Cutting Technique: Thinly Slicing, Julienne, and Carving
- Kitchen Knife Care: Maintain a Sharp Edge That Follows the Motion
- Safety, Cutting Board Stability, and Gestures to Avoid
- Practice Exercises to Build Muscle Memory
- Frequently Asked Questions
Last updated: September 22, 2026
Why Grip Changes Everything in the Kitchen
The way you hold your chef knife determines your precision, speed, and comfort. A good grip transforms a tiring motion into a fluid movement. A poor grip makes you strain, fatigues your wrist, and damages your food.
Many home cooks think that the sharpness of the blade is everything. This is false. A perfectly sharpened knife held incorrectly will produce worse results than an average knife held correctly.
Learning to hold your knife correctly is the foundation of all cutting techniques. Professional chefs do not hold their knives haphazardly. Each finger has a specific role.
Chef Knife Anatomy and Pressure Points
Before placing your fingers, you need to know the parts of the knife. Each area has a function, and your hand must know where to rest.
A chef knife consists of several elements:
- The blade: the cutting part, from the heel to the tip.
- The handle: the part you grip in your palm.
- The bolster: the junction between the blade and the handle.
- The heel: the thick base of the blade, near the bolster.
- The tip: the fine end, useful for precise work.
- The edge: the cutting wire that runs along the blade.
Pressure points are the areas where your hand comes into contact with the knife. A good grip distributes the pressure between the thumb, index finger, and the three remaining fingers.
The bolster is the most important area. This is where the balance of the motion is determined. If you grip too far back on the handle, you lose control of the tip. If you grip too close to the blade, you risk cutting yourself.
The Pinch Grip: The Standard Technical Grip
The pinch grip is the grip recommended by most professional chefs. It offers the best control and precision.
Here is how to position it:
- Pinch the bolster between your thumb and index finger, just in front of the handle.
- Wrap the three remaining fingers around the handle.
- Place your thumb on one side of the bolster and your index finger on the other.
- Keep your wrist flexible, without bending it.

Finger Placement and the Role of the Index Finger
The index finger and thumb form a pinch that guides the blade. The index finger controls the cutting angle. The thumb stabilizes the whole.
The three remaining fingers (middle, ring, pinky) wrap around the handle. They provide power and balance. This is the distribution that makes the motion precise.
Do not grip tightly. A tense hand loses sensitivity. The pinch grip works because it is light and mobile.
The Hammer Grip: When and How to Use It
The hammer grip consists of wrapping all fingers around the handle, like holding a hammer. The thumb rests on the side, near the index finger, and the wrist remains aligned with the forearm. It is the most intuitive grip for a beginner, and that is precisely why it is often misused.
Why It Provides More Power and Less Precision
The difference with the pinch grip lies in the biomechanics of the wrist. In the hammer grip, the axis of the handle extends the axis of the forearm. The force transmitted by the shoulder and elbow goes directly into the blade, without deviation. This is what makes this grip effective for splitting, slicing, or applying strong pressure.
In the pinch grip, on the contrary, the wrist is slightly bent downward. This position shortens the lever and reduces the available force, but it places the blade in alignment with the tendons of the thumb and index finger. Result: fine control increases, power decreases.
In other words, the two grips do not oppose each other: they meet two different needs. The hammer grip prioritizes the force/amplitude ratio, the pinch grip prioritizes the precision/sensitivity ratio.
When the Hammer Grip Is the Right Choice
- Splitting a thick squash or a whole butternut squash.
- Cutting poultry through a joint or cartilage.
- Breaking down a large, tough cut of meat.
- Roughly chopping large quantities of herbs or vegetables.
- Opening a pineapple or melon in half.
In these situations, precision matters less than the ability to apply pressure without tiring the wrist. The hammer grip distributes the effort across the entire palm, which limits tension.
When It Becomes a Handicap
- Thinly slicing herbs: the blade cuts crookedly.
- Julienning an onion: the slices are irregular.
- Cutting uniform sticks: the thickness varies from one piece to another.
- Working for a long session: the wrist tires more quickly because it compensates for the lack of guidance by the fingers.
In the hammer grip, the tip of the blade is no longer controlled by the index finger. It floats. On a precise cut, this loss of reference translates into slices that thicken at the end of the motion.
How to Position It Correctly
- Wrap the four fingers around the handle, without gripping tightly.
- Place your thumb on the side of the handle, level with the index finger.
- Keep your wrist in line with your forearm, without bending it.
- Grip the handle near the bolster, not at the end.
The point of contact with the handle remains close to the bolster. This is what allows you to maintain a minimum of control over the blade, even in the hammer grip.
Should You Alternate Between the Two Grips?
Yes, and it is even recommended. Most experienced cooks switch from one grip to another depending on the task, without thinking about it. The pinch grip remains the default grip for 80% of the work. The hammer grip comes in occasionally, when the resistance of the food requires it.
This alternation has another advantage: it changes the pressure points in the hand and delays fatigue during long preparation sessions.
Positioning Your Non-Dominant Hand: The Guiding Hand and Bent Fingers
The non-dominant hand, called the guiding hand, holds the food. It is what ensures the safety and regularity of the slices.
The technique is called the claw position. Bend your fingers inward, like a claw. The fingertips are tucked in, the knuckles face the blade.
The blade slides against the knuckles, never against the fingertips. This is the contact that guides the thickness of each slice.
A few references for the guiding hand:
- The thumb and pinky finger fold on the sides of the food.
- The three middle fingers move forward as you go.
- The wrist remains above the cutting board, never in line with the blade.
This position seems strange at first. With practice, it becomes natural and protects your fingers.
Adapting Your Grip to Your Hand Size and Knife
There is no single good grip for everyone. The size of your hand, that of your knife, and the condition of your joints make a difference.
The Basic Reference: Handle Length
A chef knife is correctly sized when the handle covers the width of your palm, without exceeding it. If the handle is too long, your hand slides backward and you lose control of the tip. If it is too short, your fingers overlap and the grip becomes unstable.
Here is a simple reference according to your situation:
| Hand Size | Knife Size | Recommended Grip |
|---|---|---|
| Small | Small (15-18 cm) | Tight pinch grip |
| Small | Large (20-25 cm) | Advanced pinch grip |
| Medium | Standard (20 cm) | Classic pinch grip |
| Large | Large (25 cm+) | Pinch or hammer grip |
Small Hands: Move Your Grip Forward Rather Than Forcing It
With a small hand on a 20 cm knife, the classic pinch grip places the index finger too far from the blade. The wrist bends, precision drops. The solution is not to grip tighter, but to move your hand forward.
Pinch the bolster closer to the blade, even if the index finger bites slightly on the heel. You thus regain leverage and control the tip better. Many small-statured chefs naturally adopt this advanced grip without even thinking about it.
If the handle remains too long, you can also shift your hand forward and let the end of the handle hang in the air. This is not an error: it is an adaptation.
Japanese Knife | Ultra-Sharp →
Large Hands: Move Your Grip Back Without Losing Control
With a large hand on a 20 cm knife, the fingers tighten around the handle and the index finger ends up far from the bolster. The pinch grip becomes uncomfortable. In this case, move your hand slightly back on the handle, but keep your thumb and index finger in contact with the bolster.
The error to avoid is switching directly to the hammer grip to compensate. You gain comfort, but you lose the precision you need for the majority of cuts.
Joint Pain and Arthritis: Adapt Without Giving Up
If you experience pain in your fingers or wrist, or have been diagnosed with arthritis, a standard pinch grip can become difficult. Three adaptations can help:
- Thicken the handle with a foam sleeve or a wider handle. A thicker handle reduces the effort required to close your fingers.
- Reduce cutting time by preparing food in small batches rather than all at once.
- Choose a lightweight knife: less weight to hold means less tension in your hand.
One important point: the pain does not come from the pinch grip itself, but from tensing up. A relaxed hand tires less than one that grips tightly. If you experience pain, first check whether you are gripping too tightly.
Weight and balance matter as much as size
A well-balanced knife rests naturally in the hand without requiring effort to grip. The balance point is generally at the bolster: this is where your index finger and thumb rest, and it is where the weight should be concentrated.
A knife that is heavy on the blade side tires the wrist. A knife that is heavy on the handle side tires the fingers. The right compromise is a knife whose center of gravity falls just below the index finger.
The two-tone wood and resin handle of our Japanese knives fits the palm and remains non-slip, even when wet.
Test your grip in thirty seconds
A simple test: hold your knife in a pinch grip, tip pointing down. If you can maintain the position for more than thirty seconds without tensing up, the size is right. If your fingers tire before then, the handle is too thick, too heavy, or too long for your hand.
Chef knife cutting technique: slicing, mincing, and dicing
Chef knife cutting technique is based on three basic movements. Each uses the pinch grip and the guiding hand.
Slicing: cutting into thin, even slices. The blade moves forward and backward while keeping the tip close to the cutting board. The heel does the work.
Mincing: reducing food into small pieces. For an onion, first cut it into slices, then mince perpendicularly.
Dicing: giving food a precise shape (cubes, sticks, dice). Each cut has a name depending on its dimensions.
The movement comes from the shoulder and elbow, not just the wrist. The blade swings back and forth. The tip remains in contact with the cutting board, which guides the cut.
A Japanese knife with a hammered blade reduces food adhesion. Slices no longer stick to the steel and fall directly into the dish. This detail really improves cutting comfort.

Knife care: maintaining an edge that follows your movement
A sharp edge makes a proper grip more effective. A dull knife forces you to apply extra pressure, which disrupts your movement.
Knife care is based on a few simple habits:
- Wash by hand, never in the dishwasher.
- Dry immediately after washing.
- Store on a stand or in a case, not loose in a drawer.
- Sharpen regularly, before the blade becomes truly dull.
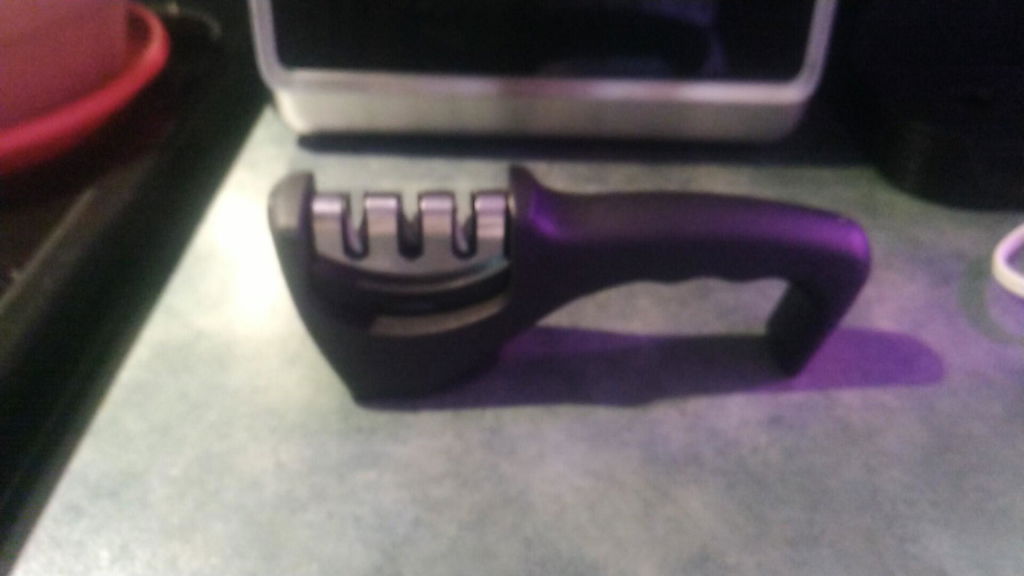
Choosing the best professional kitchen knife sharpener
The best professional kitchen knife sharpener is one that respects the angle of your blade and that you use regularly. An overly aggressive sharpener wears down the blade prematurely.
When choosing, consider three criteria:
- The angle: suitable for Japanese or Western knives.
- Ease of use: you should be able to use it without effort.
- Consistency: it must maintain a constant angle across the entire blade.
Hell-kitchen-equipment offers a range of professional knife sharpeners designed to restore sharpness without damaging the blade. A knife that cuts well follows your movement instead of hindering it.
Guide to good hygiene and maintenance practices in the kitchen
Safety, cutting board stability, and movements to avoid
Kitchen safety begins with a stable cutting board. A sliding board causes accidents.
Place a damp cloth under your cutting board. This simple step prevents it from moving while cutting. Always check its stability before you begin.
Movements to avoid:
- Never cut toward yourself or your hand.
- Never leave your fingers extended in front of the blade.
- Never cut a rolling food item without stabilizing it.
- Never apply force to a dull blade.
Cutting board stability and the claw grip are your two best protections. They reduce the risk of cuts far more than a "safety" knife.
Practice exercises to build muscle memory
Muscle memory is built through repetition. A few minutes of practice each day is better than an occasional long session.
Here are some simple exercises for beginners:
- Cut a carrot into even slices, keeping the blade tip on the cutting board.
- Mince an onion, always cutting to the same thickness.
- Cut a squash into sticks of the same length.
- Practice the claw grip with a stable food item, such as a potato.
- Repeat the rocking motion without food to build muscle memory.
Start slowly. Speed will come naturally. Focus on precision first, then speed.
An ultra-sharp Japanese knife makes these exercises easier. The blade glides effortlessly, allowing you to focus on your movement rather than force. With the right tool and a proper grip, every cut becomes a professional movement. Discover our Japanese Knife | Ultra-Sharp to make food preparation easier.
The real challenge is not understanding the proper grip, but repeating it until it becomes second nature. We select Japanese knives and professional sharpeners that make this practice more enjoyable: an ultra-sharp blade, a non-slip handle that fits the palm, and an edge that lasts. Discover our range and transform the way you cook. For example, our Japanese Knife | Forged Steel is designed for performance and the joy of cooking.
Frequently Asked Questions
How should you hold your chef knife to avoid fatigue?
The pinch grip remains the most effective: the thumb and index finger pinch the bolster, where the blade meets the handle, while the other three fingers wrap around the handle without gripping tightly. This position aligns the blade's axis with your forearm, reducing pressure on the wrist. The knife's weight works for you instead of against you. If your palm becomes painful after ten minutes, it is often a sign of an overly tight grip or a handle that is not suited to your hand.
What is the difference between a standard grip and a pinch grip?
A standard grip places the entire hand on the handle, like holding a hammer. It provides power but less control over the blade's angle. The pinch grip brings the hand forward to the bolster: the thumb and index finger frame the steel, allowing you to feel the blade and guide each cut with precision. For slicing onions or mincing herbs, the pinch grip is more precise. For cutting squash, the hammer grip has the advantage.
Why should you not place your index finger on the back of the blade?
Placing your index finger on the back of the blade gives the impression of better control, but it is an illusion. This position moves your hand away from the knife's center of gravity, tires the wrist joint, and prevents you from feeling the edge bite into the food. It also increases the risk of slipping if your fingers are wet. The pinch grip places the index finger on the side of the blade, not on its back, and it is this difference that makes all the difference in terms of precision and safety.
How should you maintain your kitchen knife so that the grip remains effective?
A dull knife forces you to apply extra pressure, which degrades your movement and increases the risk of cuts. Run the knife over a professional sharpener every two to three months depending on use, and over a honing rod before each major cutting session. Wash by hand, dry immediately, and store on a magnetic stand or in a block, never loose in a drawer. A Japanese stainless steel knife like those in our range retains its edge for hundreds of cuts if you follow these simple steps.