Table of Contents
- Why You Cut Vegetables Too Slowly (and How to Fix It)
- Tip 1: Use a Sharp Knife for Clean Vegetable Cuts
- Tip 2: Rinse the Onion Under Cold Water to Prevent Tears
- Tip 3: Refrigerate or Freeze the Onion Before Cutting
- Tip 4: Wear Safety Glasses and Use an Extractor Hood
- Tip 5: The Chewing Gum Technique and Other Tear-Prevention Methods
- Tip 6: Cut Off the Ends First to Stabilize Your Vegetables
- Tip 7: Use a Mandoline or Food Processor to Save Time
- Basic Vegetable Cutting Techniques: Brunoise, Julienne, and Basic Cuts
- Kitchen Safety When Cutting Vegetables: Rules You Should Never Ignore
- Frequently Asked Questions
Last updated: September 19, 2026
Why You Cut Vegetables Too Slowly (and How to Fix It)
Slowness in the kitchen is almost never due to a lack of talent. It stems from a dull knife, an unstable cutting board, and a technique learned by instinct. Learning to cut vegetables quickly relies on seven practical factors, from the sharpness of the blade to eye protection. Learning to cut vegetables quickly relies on seven practical factors, from the sharpness of the blade to eye protection.
The problem is rarely your hand. It's the tool and the method.
A knife that can no longer pierce the skin of a tomato forces you to saw. A cutting board that slips makes you slow down for fear of an accident. An onion cut too close to your face makes you cry, so you hesitate. Each of these obstacles costs seconds, and those seconds add up with every meal.
This method is based on simple principles of physics and ergonomics, not marketing shortcuts. Here are the seven tips, in the order they actually improve your speed.
Tip 1: Use a Sharp Knife for Clean Vegetable Cuts
A sharp knife is the first free speed boost for your kitchen. A dull blade crushes fibers instead of slicing through them, forcing you to press harder, saw, and start over. A sharp blade enters the food on the first pass.
The difference is felt in the motion, not measured by a stopwatch. With a sharp knife, you cut a carrot in three strokes instead of eight. You keep your wrist straight. You tire less, so you maintain your pace longer.
A guide to good kitchen hygiene practices also reminds us that clean and well-maintained utensils reduce the risk of cross-contamination, a point often overlooked when discussing performance.
How to Sharpen Your Kitchen Knives: The Simple Method
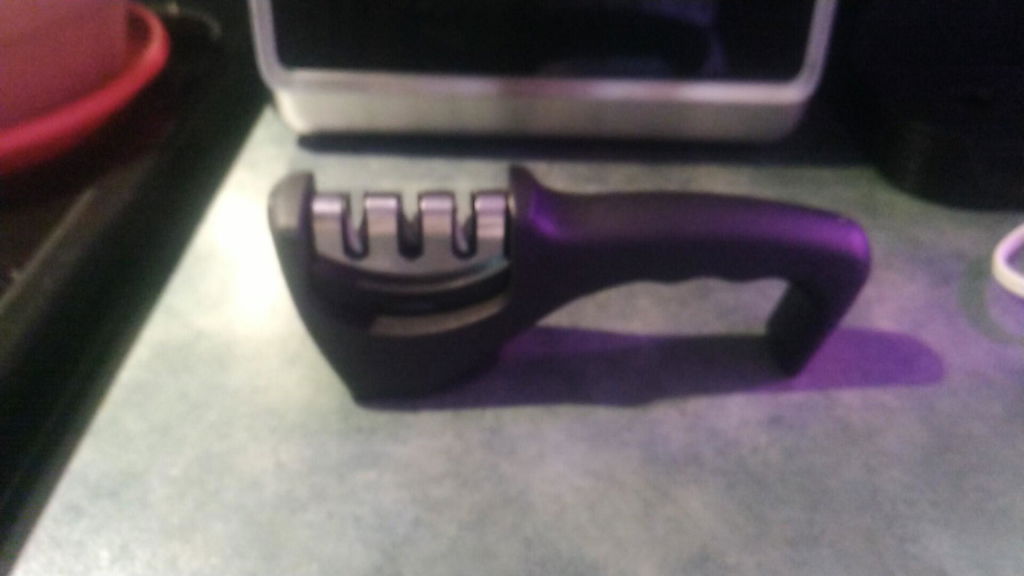
Sharpening doesn't mean filing for twenty minutes. A two-step manual knife sharpener, with a coarse pass followed by a fine pass, restores the bite of a blade in just a few seconds per side.
A few time-saving pointers:
- Sharpen before each major cutting session, not once a month
- Hold the knife at a constant angle, about 15 to 20 degrees depending on the model
- Alternate sides to avoid unbalancing the edge
- Rinse and dry the blade before cutting to remove residue
A Japanese knife with a hammered blade also reduces food adhesion: cucumber slices no longer stick to the steel and fall directly into the dish. This detail may seem minor, but it eliminates a motion repeated dozens of times per preparation.
Tip 2: Rinse the Onion Under Cold Water to Prevent Tears
Cold water is the fastest way to stop stinging eyes. Rinse the peeled onion under a stream of cold water before slicing it, or submerge it for thirty seconds in a bowl of ice water. Some of the sulfur compounds are washed away before they reach the air.
The logic is simple. When you slice an onion, you break the cells and release enzymes. These enzymes convert odorless sulfur compounds into a volatile gas that, upon contact with the eye, turns into diluted sulfuric acid. It is this irritation that triggers tears.
By rinsing the surface, you remove some of the precursors before they become volatile. The result is never perfect, but the difference is noticeable with a whole onion.
This tip works better on sweet onions than on raw red onions, which contain more pungent compounds. Keep it for your everyday preparations.
Tip 3: Refrigerate or Freeze the Onion Before Cutting
Cold slows down the chemical reaction that makes you cry. Thirty minutes in the refrigerator, or ten to fifteen minutes in the freezer for a whole onion, is enough to significantly reduce eye irritation.
The mechanism is direct: cold slows the activity of the enzymes that convert sulfur compounds into tear gas. Less gas released, fewer tears. The cutting motion remains the same; only the reaction speed changes.
Be careful not to overfreeze. An overfrozen onion becomes hard and slippery under the blade, increasing the risk of cuts. Aim for cooling, not complete freezing.
This method pairs very well with the cold water from the previous tip. Cool first, then rinse: the combined effect is more pronounced than either action alone.
Tip 4: Wear Safety Glasses and Use an Extractor Hood
Glasses and an extractor hood tackle the problem where it matters: between the gas and your eyes. Safety glasses, even simple well-fitting eyeglasses, create a physical barrier. An extractor hood running at medium power vents the gas before it rises toward your face.
Tear gas is denser than air and rises. An extractor hood placed above the work surface therefore captures part of the flow before it reaches your eyes. It is one of the few tips that acts on the environment rather than the food.
The combination is particularly useful when cutting several onions in a row, for a soup or a large ratatouille. For a single onion, the benefit remains modest.
These two steps cost nothing and do not change the taste of your dishes, unlike some methods that alter the texture of the onion.
Tip 5: The Chewing Gum Technique and Other Tear-Prevention Methods
Most articles simply list tips without explaining why they work. Understanding the mechanism changes everything: you will know which method to use depending on the situation, instead of trying them all at random.
What Really Happens When You Cut an Onion
When the blade breaks the onion's cells, it brings an enzyme (lachrymatory factor synthase) into contact with odorless sulfur compounds called sulfoxides. This reaction produces a volatile gas, syn-propanethial-S-oxide. This gas rises toward your eyes, dissolves in the tear film, and turns into a slightly acidic solution, diluted sulfuric acid. It is this acidity that irritates the cornea and triggers the tear reflex.
Remember this point: the gas is denser than air and tends to rise. Any method that blocks, dilutes, or vents this gas works. Any method that does not act on any of the three fails.
Categorize Methods by How They Work
Act on the precursors (before cutting)
- Cooling the onion slows the enzyme, thus producing less gas (see tip 3)
- Rinsing under cold water removes some of the surface sulfoxides (see tip 2)
- Keep the root intact as long as possible: this is where the concentration of precursors is highest
Act on the released gas (during cutting)
- The extractor hood vents the gas before it reaches the face
- A closed container (manual chopper with a cord) confines the gas inside
- A lit candle near the cutting board burns part of the surrounding gases, with a modest but real effect
- Cutting under a stream of running water dissolves part of the gas as it passes
Act on your body (physical barrier)

- Safety glasses or even well-fitting eyeglasses block the gas before it reaches the cornea
- Chewing gum changes your breathing and jaw position, which reduces the passage of gas to the tear ducts. The effect is real but partial, and it does not replace a physical barrier.
Why Some Popular Tips Don't Work
Putting a metal spoon in your mouth, wetting your face, or holding a match between your teeth: these methods do not act on any of the three points of action. They distract you but do not reduce the concentration of gas at the eye level. If you have tried them without success, it is not you, it is the method.
Adapt Your Technique to the Onion Variety
Not all onions make you cry with the same intensity, because their concentration of sulfur compounds varies:
Vegetable Cutter | Ultra-Efficient →
- Raw red onion: the highest in precursors, and therefore the most irritating. Reserve the cooling + closed container combination for it.
- Yellow onion: medium concentration, the everyday onion. Rinsing under cold water is often enough.
- White onion: milder, often eaten raw. Irritation remains moderate.
- Sweet onion (Roscoff or Cévennes sweet onion): low in pungent compounds, it rarely makes you cry. There is no need to bring out the heavy artillery.
This distinction explains why a tip that works for you may fail for a neighbor: you are probably not cutting the same variety.
If you cut onions every day, investing in a closed chopper will change your daily life more reliably than a single tip.
Tip 6: Cut Off the Ends First to Stabilize Your Vegetables
A stable base is the condition for any quick cut. First cut off the end of the vegetable to create a flat surface, place this surface on the cutting board, and the vegetable stops rolling. You can then cut without holding it, so faster and straighter.
This principle applies to almost everything: carrots, zucchini, eggplant, cucumber, potatoes. A rolling vegetable forces you to slow down, adjust your grip, and sometimes start over. A flat surface eliminates this hesitation.
The order also matters. Peel, cut off the end, stabilize, then slice. Many cooks do the opposite and waste time trying to catch an unstable vegetable.
Also remove the outer skin of the onions and the first dry layer. These elements add nothing to the taste and damage the blade edge over time.
Stability is not just a matter of speed. It is also the first rule of kitchen safety: a vegetable that does not move means a hand that stays away from the blade.
Tip 7: Use a Mandoline or Food Processor to Save Time
The mandoline is the tool that most radically transforms your cutting speed. A mandoline can slice a whole cucumber in less than thirty seconds, with a regularity impossible to achieve with a knife. For large quantities, this is the most visible gain.


Models with safety pushers, like the professional kitchen mandoline from Hell-kitchen-equipment, keep your fingers away from the blade. The collection tray catches the slices directly, eliminating the back-and-forth to a bowl.
A food processor plays a different role. It excels with large volumes and irregular textures: chopping herbs, pureeing, mixing. For a clean julienne, the mandoline remains more precise. The choice therefore depends on the task, not the price.
| Tool | Ideal use | Time savings | Cutting precision |
|---|---|---|---|
| Sharp knife | Small quantities, finishing | Low | High if technique is mastered |
| Adjustable mandoline | Thin slices, julienne, medium volume | High | Very high and uniform |
| Food processor | Large quantities, chopping, pureeing | High on large volumes | Medium on clean cuts |
| Manual chopper | Onions, herbs, garlic, small quantities | Medium | Good on chopping |
If you lack space, a compact mandoline fits in a standard drawer and replaces several utensils. It is the compromise chosen by most home cooks.
Beginner vegetable cutting techniques: brunoise, julienne, and basic cuts
Mastering three cuts is enough to cover the majority of recipes. But the difference between a beginner and a fast cook is not in the definitions, it is in the mistakes you avoid. Here are the three basic cuts, their actual dimensions, and the pitfalls that slow you down.
The three reference cuts
The brunoise: regular cubes of 2 to 3 millimeters on each side. It is used for fine garnishes, sauces, and stuffings. Uniformity matters more than size, uneven cubes cook unevenly, and you waste time sorting them.
The julienne: thin stick of 2 to 3 millimeters in cross-section and 4 to 5 centimeters long. It is found in crunchy salads, woks, and spring garnishes. The mandoline makes this cut almost automatic.
The mirepoix: larger cubes, around 1 centimeter, used as an aromatic base for stocks, stews, and sauces. It is the most frequent cut in daily cooking, and the one that forgives the most deviations in uniformity.
The mistakes that slow you down (and that no one mentions)
Most guides list the cuts without saying what holds you back. Here are the five most common mistakes:
- Stacking vegetables high: beyond two or three layers, the stack slips and you slow down to catch it. Work in small batches.
- Cutting uneven slices and then hoping for regular cubes: uniformity is built in the first step. Irregular slices will inevitably give irregular sticks, then irregular cubes.
- Sharpening during cutting: you sharpen before starting, never in the middle. Otherwise you lose the rhythm and the motion.
- Changing cuts halfway through: finishing a julienne before moving to the brunoise avoids mixing the piles and having to restart a vegetable that has already been cut.
- Neglecting the size of the board: a board too small for the volume to cut forces you to move the vegetables constantly. A board of at least 30 × 40 cm changes the comfort on large preparations.
The three-step method to improve quickly
All basic cuts follow the same logic: slices, then sticks, then cubes.
- Slicing: cut the stabilized vegetable into slices of uniform thickness. It is the step that determines everything else.
- Stacking: stack two or three slices maximum, never more.
- Cutting: cut into sticks (julienne) or cubes (brunoise, mirepoix) according to the desired width.
A few markers to anchor the motion:
- Keep the same dimensions from one vegetable to another for even cooking
- Cut into regular slices first, then stack and cut
- Work in small batches rather than stacking a mountain of vegetables
- Sharpen before starting, never during
Once these three cuts are mastered, you read any recipe without hesitation, and you cut faster because you no longer think about the motion.
Safety in the kitchen vegetable cutting: the rules to never ignore
Safety is not a brake on speed, it is its condition. Most cutting accidents come from a dull blade, an unstable board, or a misplaced finger. Correcting these three points speeds up cutting instead of slowing it down.
The rules that really matter:
- Keep your fingers curled in a claw, the knuckles guide the blade, never the tips
- Use a non-slip board or place a damp cloth underneath
- Always cut away from your body
- Use the safety pusher provided with every mandoline, without exception
- Never leave a blade soaking in the sink, where it becomes invisible
- Clean and store your blades immediately after use
A reminder of the food hygiene and safety rules confirms that the cleanliness of utensils and work surfaces is an integral part of safety in the kitchen, not just comfort.
Speed comes after mastery. A safe and regular motion always beats a fast and nervous motion, because it does not interrupt itself.
Learning vegetable cuts quickly comes down to a few things: a blade that really cuts, a stable base, and the right tool for the right volume.
Frequently Asked Questions
How to not cry because of onions?
Several methods limit tears: rinsing the onion under cold water before cutting it, placing it 15 minutes in the refrigerator or 10 minutes in the freezer, using an extractor hood to evacuate sulfur compounds, or wearing protective glasses. The chewing gum technique also helps some people by encouraging mouth breathing. Combining two methods gives better results.
What is the basic technique for cutting vegetables quickly?
Start by stabilizing the vegetable by cutting one end to create a flat surface. Hold the knife with the thumb-index pinch on the blade, the other three fingers on the handle. Fold the fingers of the hand holding the vegetable into a claw to guide the blade. Move forward with regular movements without lifting the knife. A well-sharpened knife and a stable board are essential to gain speed.
What are the essential utensils for efficient cutting?
A well-sharpened chef's knife remains the main tool. A kitchen mandoline allows regular slices in a few seconds, with a safety pusher to protect your fingers. A mini manual chopper like the QuickChop chops herbs and onions without electricity. A spiralizer vegetable cutter transforms zucchini and carrots into ribbons. These utensils for cutting vegetables quickly considerably reduce preparation time.
How to learn the different cut sizes (brunoise, julienne)?
The julienne produces sticks of 2 to 3 mm thickness and 5 cm length. The brunoise is a cut into cubes of 2 to 3 mm obtained by cutting the julienne into small cubes. The mirepoix corresponds to 1 cm cubes. To start, cut regular slices first, then stack them and cut into sticks, then cubes. A mandoline with interchangeable blades helps to obtain constant sizes without advanced technique.
Why is it important to have a well-sharpened knife to cut your vegetables?
A dull knife crushes vegetables instead of slicing them, which damages cell membranes and accelerates browning. It requires more force, increases the risk of slipping and injury, and considerably slows down cutting. A sharp knife glides effortlessly, produces a clean cut that preserves texture, and reduces fatigue. Sharpen every two or three uses with a suitable sharpener.